As we are tearing down the truck I will be fitting a few items. I want to be sure some of the updated items will actually fit in the truck. I also don't want to create a mess after the paintwork is complete. So fitting the seat seems like a logical first step.
First, I have to say that updating to a new seat in a 67-72 Ford truck can be very easy. It is my understanding that any F-150 seat from 67 to 97 will fit using the original bolt holes and possibly the slides. I didn't go that route and created a bunch more work. But I think the trade off worked for me. I used a 95 Dodge truck seat with the seperate driver and pass slide controls as well as a flip down storage/middle seat. The reasons I picked this seat are added leg room, three in the family, much needed storage space, and the fact that I used to own a 98 Dodge PU and just really like the seat. I spent alot of time looking at pictures of other ford trucks using modern seats and the Ford seats appear to make the dash to seat space pretty darn small. Originally, the truck had 16 inches from dash to seat in the full back position. With the Dodge seat I still have 15 inches of space with the seat back in the position I like. Ford seats I measured and looked at appeared to leave 12 to 13 inches of space. I like my space!
Also, let me state that I am very eclectic in my automotive tastes. I like just about anything and have no problem putting some 'other make' stuff on my Ford. Don't worry, I'm gonna use a Ford engine!
The following details the procedure we used to install the new seat. I'm writing this kind of like a 'how to' article so it may help others. It's best to get a friend to help as there is some lifting and measuring that may be difficult otherwise.


1. Put the original seat in the farthest back position and take some measurements. You are going to want the new seat at a similar orientation. The distance from the lower lip of the dash to the front edge of the seat was approx 16 inches. The height from the center of the floor (top of the tub to the front top of the seat was 10 inches). The height from the center of the floorpan (where you would sit) to the top front edge of the seat was 14 inches.
2. Remove the original seat and carpeting. This entails removing 8 bolts from the seat mounts. Pulling the seat, scuff plates, and seat belts makes the carpet easily removable. Save the original seat tracks as they will be needed later. In my case, I will be relocating the gas tank to the underside of the truck, so I removed it as well. The reason I am moving the tank is to create more space behind the seat. Most seats with a flip down center section will need the gas tank space to flip.
3. To mount the Dodge seat I decided to use the bottom section of the original seat tracks. They are rivited and need to be taken apart. The part that monts to the floor is the part I used.


4. The Dodge seat mounts must be removed from the seats. Most are riveted on and I simply chiseled and drilled them off. The center section uses 4 bolts. Remove them but save the bolts. You will now have 3 seperate seat section to work with.
5. Mount the original seat track section to the floor. There are two of them, one for each side.
6. Set the new drivers side section roughly in position. Put the tracks (Dodge ones on the seats) in what would be the full back position. Put the back in what appears to be a good driving position. Then mark the floor under the seat where the ends of the track slides are. It's a good idea to take a dash to seat front measurement just to make sure you aren't too far forward with the seats. It should be about 15 inches.


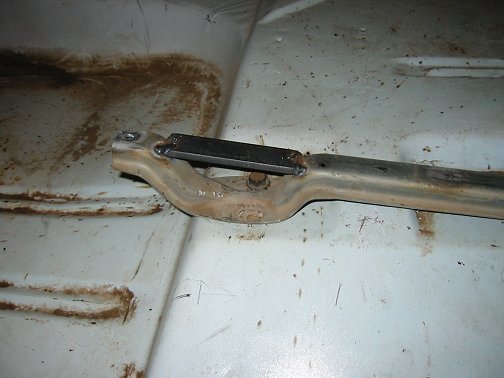
7. Pull the seat out. The original seat mount that is bolted to the floor has a 'dip' in it near the front bolts. I welded in a piece of 1/4" x 1" x 4" metal strapping to make the mount level all the way across.
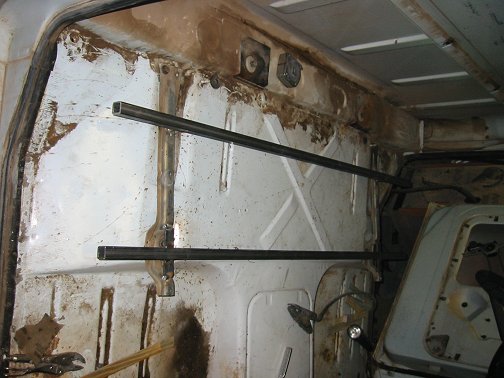
8. Now we welded two pieces of 1" x 1" tube stock across both mounts about 1/2" back from the front of where the slide will be (1/2" back from the front mark you made on the floor). Both sides should be measured to match. This will be the front mount for the entire seat (all 3 sections). It nneds to overhang the original mount by about 7" to accept the new seating arrangement.
9. The rear mount needs to be raised from the original mount about 1 1/4". I welded a 1 1/4" long piece of 1/2" round stock to the top of the original track. It was placed so that the second new cross mount can be located right at the end of the seat slide (the rear end of it is flush with the rear end of the slide). After mounting the round stock we welded on the second new cross mount on top of them. The reason for this is because the cross runner would hit the floor in the center otherwise.
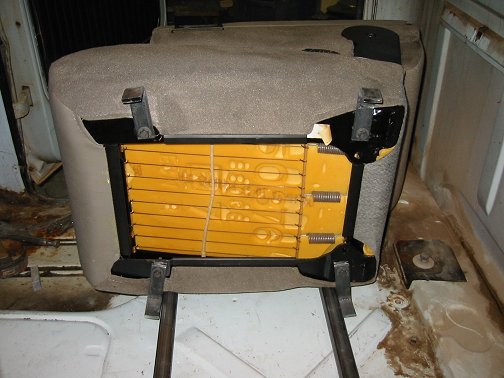
10. Now you have two new mounts to support the new seats. It's time to mount the center section. Make four new mounts to hold the center section. We made them from 1/4" x 1" strapping. They are basically an L shaped piece with a 3" leg and a 1 1/2" leg. We just bent them in the vise. About 1/4" from the end of the 3" leg, we drilled a hole large enough to accept the center section bolts you saved earlier. Now loosly bolt them to the bottom of the center section.


11. Placing the center section is important. Once it's in place it will be hard to fix. So find the exact center of the truck. The center does not lie at the center of the hump. The center of the truck IS the same as the center of the mounts though. Now place the center section on the new cross mounts and fit it both sideways and front to back. You may have to angle the L mounts you just made to get the position you want. Make sure the section opens properly without hitting the rear of the cab. I left about 1/2" between the cab and the back of the center section in the open position. When you are sure you have it correct, weld the L brackets to the cross mounts. Make sure you cover the seat and have a spray bottle nearby in case the underside gets too hot. I used a damp towel to block the sparks. Now tighten up the bolts under the center section.


12. Now it's just a matter of mounting the seats to match the height and angle of the center section. Before you do so, the seat belts for the center section need to be attached to the same bolts used to hold the seat buckles for each seat. This is because the center section belts are originally mounted to a mount that was removed. The rear of the seats ended up perfect but the fronts needed to be angled upwars about 1/2". We used 8 pieces of 1" x 1" x 1/4" flat stock because that's what was around. These were welded to the top of the cross mounts so they would line up with the bottom of the slide. I used masking tape to mark the slide positions. Make sure the seat is straight and the gap between it and the center section looks good before welding!
13. Now the seats are ready to be mounted into the final position. Place the seat on the cross mounts so the front sits on the new spacers. Be sure of fit and weld the bottom of the slides to the cross mounts. This is probably the most difficult part as it's hard to weld under there. Of course you could just tack it, remove the assembly, and weld it out of the truck. Make sure you don't weld too high up on the slide as it could interfere with the sliding action.


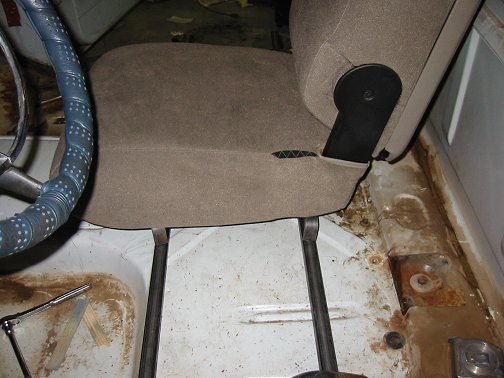
14. Now the seat is mounted and it looks great! The only thing left is to drill a couple holes for 2 springs under the seats. I put those holes in the original mount near the front bolts. I also drilled them after I removed the seat for storage until I put the interior in.
While it was alot more work than I expected, I am happy with the results. It is certainly comfortable and that's what I want!